
This wonderful Victorian statue of Saint Joseph was already in my husband's possession when I met him. It had been given to him by a local Roman Catholic Priest, badly damaged and no longer required. It had water damage and missing fingers from the earliest days. The head had been knocked off and badly replaced at an unknown date and over the many years, the paint continued to flake away. It had never had a staff in all the time we knew it. By the time I came to start the restoration, it was in a pretty sorry state. Being Victorian, it was, however, beautifully modelled and I could see its potential. It really deserved to be brought back to it's former glory.


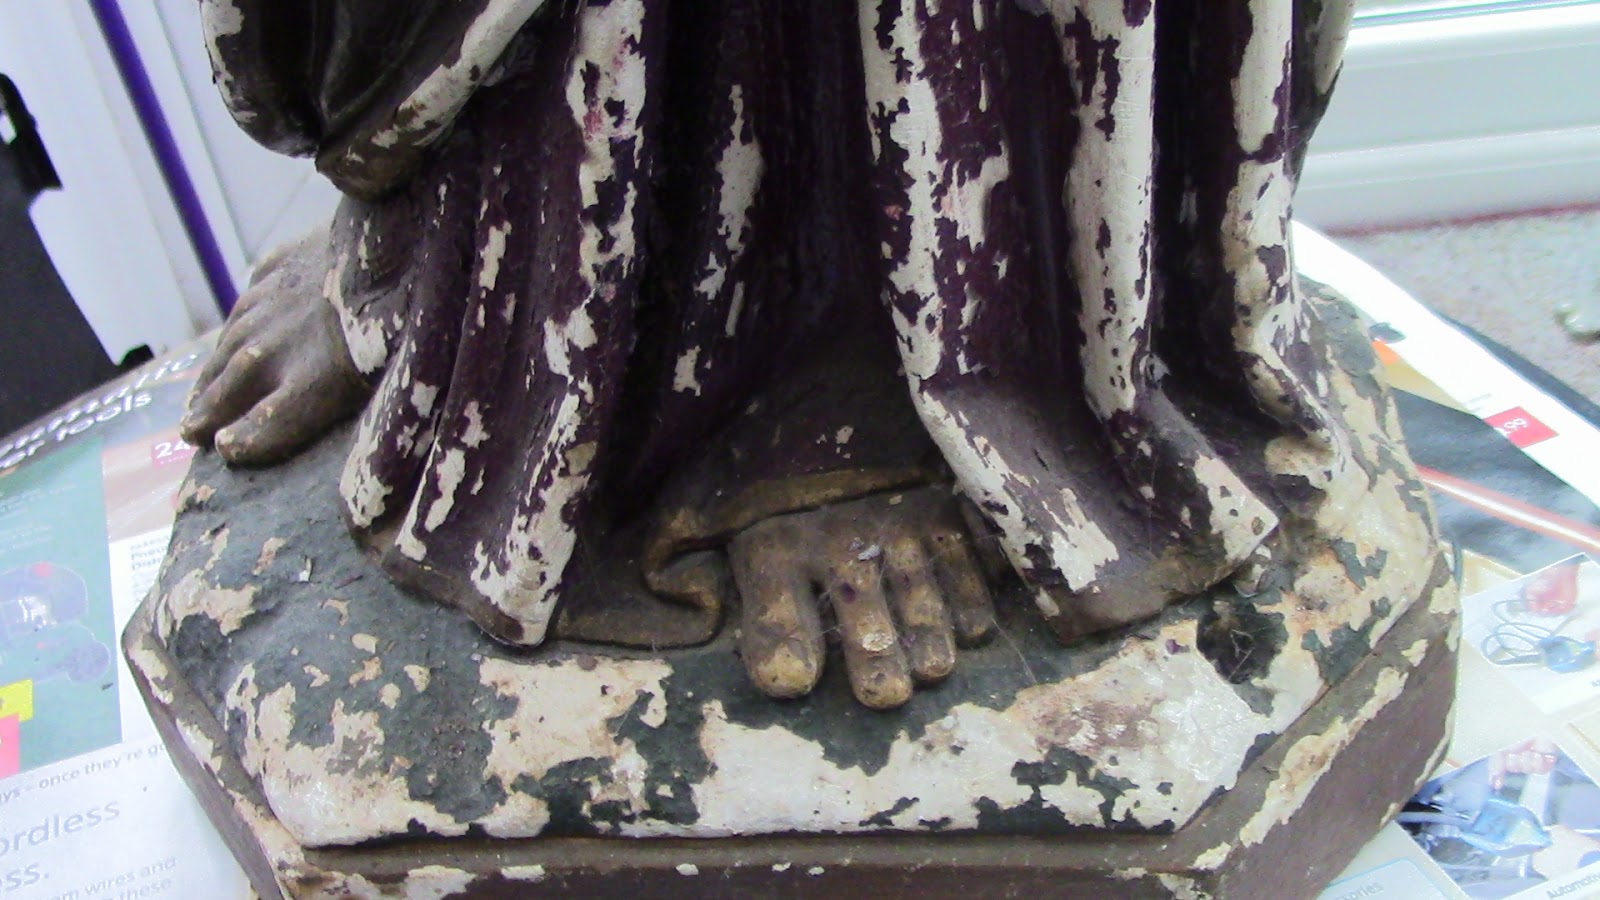
At first I thought I would be able to sand it down to re-paint, but once I started it was clear the remaining paint could not remain. It flaked off the minute the sandpaper touched it. Rather than continue with a very labour intensive scraping of the paint, I decided to try paint stripper. This was a very messy business and not an enjoyable one. Once all the paint had been removed, I washed the statue down several times to remove any residue Then the enjoyable part began.

I started with the missing fingers on the staff hand. I drilled small holes into the plaster finger remains and inserted wires bent to shape. As the hand would be holding a staff, I inserted a wooden dowel rod covered in clingfilm to stop it sticking to make sure the new fingers were shaped around the staff correctly.

I modelled the new fingers in decorator's filler,
mixed to a fairly thick consistency. This enabled
me to form and smooth them using wooden tools
and a wet paintbrush so that there was minimal
sanding required once dry.


The neck repair was necessary to hide the bad join from a historic repair. The head had obviously been knocked off and stuck back slightly 'off' and the crack was still visible. I had intended to remove the head and re-set it correctly but it was so well glued I found I couldn't remove it. Rather than risk further damage, I decided to leave the head in place. I removed some plaster around the join to make a larger crack which was then easier to fill. Decorator's filler was, yet again, the medium of choice. The join was then sanded down, including a little of the original chalkware to create a smooth neck all around with no join visible.
Apart from re-painting, the only other work necessary for the restoration was the creation of a halo and a staff. Both rather important elements. I wanted to make the lilies on the staff from something easily moulded but durable. Air-dry clay seemed a possible option, but it is not strong and is easily broken. However, Jonni Good's version, https://www.ultimatepapermache.com/new-air-dry-clay-recipe which is a combination of ready-mixed decorator's filler and pulped toilet paper, amongst other things, is easily mouldable and dries hard but not brittle. I was excited to try a new medium too.


I downloaded a picture of an Easter Lily and modelled the various elements using the paper clay. They were left to dry for a week before being painted with artist's Acrylic paints. The colours were matched against real lily stems. I particularly wanted to get the green of the leaves just right.

I used a garden bamboo cane for the rod and drilled small holes to hold the wired flowers and leaves. I experimented with the positioning of each flower with the staff in the hand until I was happy. I didn't want the flowers to obscure Joseph's face and I wanted them to look good from any angle as the final position of the statue would enable it to be seen from every angle. Once the final adjustments had been made, I glued everything using Hard As Nails cartridge adhesive.

More paper clay was added to the wire stems to thicken them and join them more realistically to the stem. I textured the bamboo cane using more adhesive to make it look more like wood at the bottom, becoming smoother as it neared the lilies, to represent a walking staff of wood, turning into a flowering lily at the top. For the same reason, the stem was painted brown at the bottom, blending into the lily-leaf green at the top. The whole thing was sprayed with clear varnish to create a sheen and to make the surface easier to clean. I was delighted with the finished result.
I thought very carefully about the colours I wanted to paint the robes. I chose Victorian colours and really just used my instinct. I mixed artist's acrylics to get the shades I wanted. This was really my first experience of mixing my own colours and I found it a very enjoyable process. I tested each colour on white paper, painting squares and allowing them to dry until I was satisfied with the final colour. It is surprising how much darker the acrylics dry. The most difficult colour was the flesh-tone for the face, hands and feet. Most old statues one sees have very dark skin tones. This is entirely due to aged varnish and years of grime often caused by the burning of incense. I wanted to take it back to a more natural tone, as the statue would have had originally. Again, I used my instinct, adding drops of this and that colour until I achieved the tone I wanted. Once all the colours were mixed, I began to paint. The robes were pretty straightforward, being plain colour with a gold border. The face and hair were the most difficult. Victorian faces were exquisitely painted with beautifully shaded rosy cheeks and delicate eyes. What can I say? I did my very best. I thoroughly enjoyed the experience and I think I've done a good job. The final thing to do was to make the halo. The statue had holes on the head and back for fixing. I fashioned a simple circlet from garden wire hammered around a baking tin and painted it gold. This was not how the statue would have looked originally and it did not make use of the hole in the head.
 |
| Finished St. Joseph with simple halo |
 |
| Detail of the face. |
 |
| Repaired Hand |
 |
| Downloaded picture |
 |
| Traced pattern and cutting out |
 |
| Cutout Complete
Once completely dry, the paper clay halo was repaired with decorator's filler and had the details carved into it using small woodcarving tools. Equally, lino cutting tools could have been used. It was painted using gold wood and metal paint.
|
 |
| Finished Halo Painted Gold |
 |
| Close-up of Finished Joseph with Ornate Halo |
 |
| Finished Restored St Joseph |